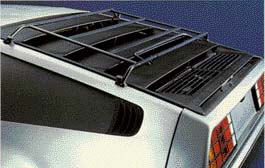
Factory Original Luggage Rack
As I have stated in other areas of this site, the
DeLorean suffers from a lack or storage space. The luggage rack
came about because of the demand placed on the company to come up with a
method of transporting a rear tire...other than in the front seat.
Instead of announce to the world that the car had a storage
"flaw" the company marketed there solution as a "Luggage
Rack" even offering a ski attachment. Here are my experiences
with the installation.
Total Installation Time: 3 1/2 hours (including a
run to the hardware store and 2 young "helpers")
Click on a picture for a larger image
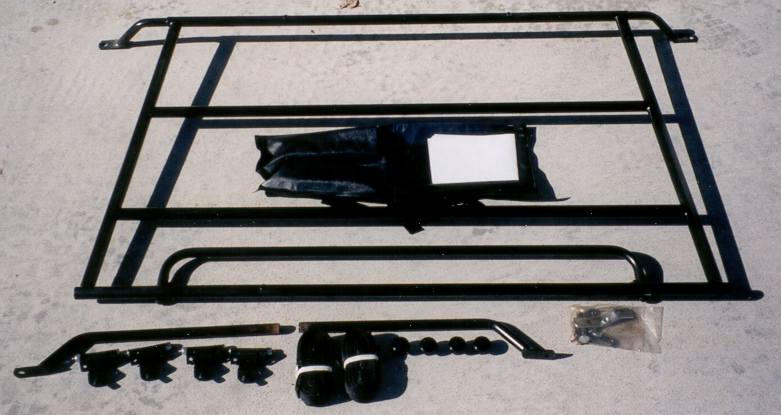
 Here
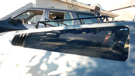
are all of the components that come with the luggage rack.
You get the rack its self. The bottom attachments are removable
to make stowing in the trunk a little easier. There are 4
hinge type things that you have to mount under the louvers to
support the rack when it is installed. Also included are
two luggage straps to secure luggage...or a wheel. Here
are all of the components that come with the luggage rack.
You get the rack its self. The bottom attachments are removable
to make stowing in the trunk a little easier. There are 4
hinge type things that you have to mount under the louvers to
support the rack when it is installed. Also included are
two luggage straps to secure luggage...or a wheel.
 I
will probably leave these untouched in the storage bag and just
stick with bungee cords. The picture to the right shows
the car before the installation of the rack. Here are a
couple of things that you will need to have in order to install
the rack: A good drill with a nice sharp 1/4 inch drill bit (I
actually went through 3 drill bits trying to get through one of
the welds. You will also need a hammer and a good metal
punch. Without a punch there is no telling where the hole
you are trying to drill will end up. I used a scratch awl
and then had to hammer a few times on a Phillips screw driver to
get a good "dimple" in the stainless steel where I was
to drill. I
will probably leave these untouched in the storage bag and just
stick with bungee cords. The picture to the right shows
the car before the installation of the rack. Here are a
couple of things that you will need to have in order to install
the rack: A good drill with a nice sharp 1/4 inch drill bit (I
actually went through 3 drill bits trying to get through one of
the welds. You will also need a hammer and a good metal
punch. Without a punch there is no telling where the hole
you are trying to drill will end up. I used a scratch awl
and then had to hammer a few times on a Phillips screw driver to
get a good "dimple" in the stainless steel where I was
to drill. |
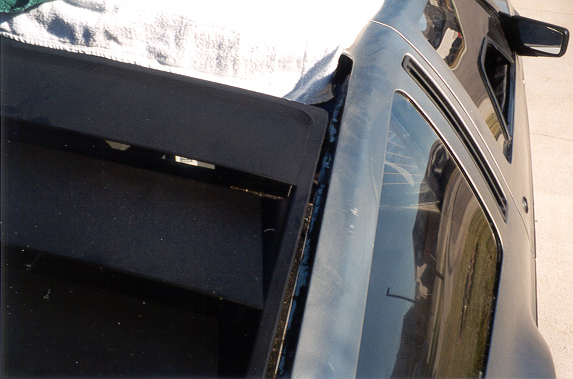
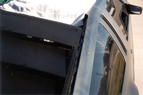
 The
first step is to take off the weather stripping that is on both
sides of the car (where the louvers rest when closed). Be
careful here, the strips are almost 20 years old and crack
easily. The use of an adhesive remover might be
helpful. Although the directions specify placement of the
hinges lining up with rivets, my car had welds instead.
The welds should be at about the same location that the rivets
were supposed to be, but test your location before drilling.
Place your top two hinges as specified by the instructions and
close the louvers. (Make sure that the hinges are pushed as far
to the outside of the car as possible). Place the rack on
the bolts and see if it lines up like the the picture on the
left. The top bar of the luggage rack should be just above the
bottom of the top louver. Once the hinges are aligned
correctly, mark the placement on the stainless steel with a
sharpie. The
first step is to take off the weather stripping that is on both
sides of the car (where the louvers rest when closed). Be
careful here, the strips are almost 20 years old and crack
easily. The use of an adhesive remover might be
helpful. Although the directions specify placement of the
hinges lining up with rivets, my car had welds instead.
The welds should be at about the same location that the rivets
were supposed to be, but test your location before drilling.
Place your top two hinges as specified by the instructions and
close the louvers. (Make sure that the hinges are pushed as far
to the outside of the car as possible). Place the rack on
the bolts and see if it lines up like the the picture on the
left. The top bar of the luggage rack should be just above the
bottom of the top louver. Once the hinges are aligned
correctly, mark the placement on the stainless steel with a
sharpie.
 Use
your metal punch or awl to pound in a dimple at the location to
drill. Drill your first hole, and then replace the hinge
to make sure that the hole did not drift at all. If so,
remark your second hole and repeat the drilling process. As
shown in the picture to the right, I didn't have room between to
get under the louver with the drill so had to remove the
louvers....not recommended if you are working alone! This
is not the funniest part of the car to reinstall. The
placement of the top hinges is pretty critical. If
improperly placed, you may not get the luggage rack onto the
bolts. Mine is very close to not fitting! Use
your metal punch or awl to pound in a dimple at the location to
drill. Drill your first hole, and then replace the hinge
to make sure that the hole did not drift at all. If so,
remark your second hole and repeat the drilling process. As
shown in the picture to the right, I didn't have room between to
get under the louver with the drill so had to remove the
louvers....not recommended if you are working alone! This
is not the funniest part of the car to reinstall. The
placement of the top hinges is pretty critical. If
improperly placed, you may not get the luggage rack onto the
bolts. Mine is very close to not fitting! |
 The
hinge attaches through the stainless steel to a small plate with
two threaded holes that will hold the hinge in place. Once
you have these hinges installed, close the louvers and put the
rack on. (You have more leeway with the lower hinges since
the lower pieces of the rack will slide in and out and rotate). The
hinge attaches through the stainless steel to a small plate with
two threaded holes that will hold the hinge in place. Once
you have these hinges installed, close the louvers and put the
rack on. (You have more leeway with the lower hinges since
the lower pieces of the rack will slide in and out and rotate).
 Place the lower arms on the rack and place where they will sit
when installed. I used a vis-à-vis marker to place dots on
the fender in the middle of the holes. This type of marker
will just wipe off of the stainless steel. With my dots on
place, I removed the rack and aligned the lower hinges based on
where my dots were. If satisfied, mark your drill points
and start drilling. Again check your hinge after each hole
to make sure you are still on track. Once these hinges are
installed, put on your luggage rack, screw on your retaining
thingies and admire your work....but you are not done yet!
The weather stripping needs to be trimmed to fit around the
hinges and reinstalled. I have heard of people just cutting a
notch in the bottom of the rubber, leaving the top part
complete...however this would force your to leave the hinges up
and visible at all times (even when the rack is not
installed). I cut the bottom piece of the rubber to fit from
the lower hinge down, and then cut a slit in the top piece to
allow me to lift it when opening or closing the hinge. Due
to it's age, this didn't work. When I tried to lift the
flap, the rubber just snapped of in my hand (put at least it did
it right where the hinge started). Once I had my pieces
all cut, including a small triangle shaped piece for the top I
reattached them using "Marine Goop"
basically because it sounded cool....
Place the lower arms on the rack and place where they will sit
when installed. I used a vis-à-vis marker to place dots on
the fender in the middle of the holes. This type of marker
will just wipe off of the stainless steel. With my dots on
place, I removed the rack and aligned the lower hinges based on
where my dots were. If satisfied, mark your drill points
and start drilling. Again check your hinge after each hole
to make sure you are still on track. Once these hinges are
installed, put on your luggage rack, screw on your retaining
thingies and admire your work....but you are not done yet!
The weather stripping needs to be trimmed to fit around the
hinges and reinstalled. I have heard of people just cutting a
notch in the bottom of the rubber, leaving the top part
complete...however this would force your to leave the hinges up
and visible at all times (even when the rack is not
installed). I cut the bottom piece of the rubber to fit from
the lower hinge down, and then cut a slit in the top piece to
allow me to lift it when opening or closing the hinge. Due
to it's age, this didn't work. When I tried to lift the
flap, the rubber just snapped of in my hand (put at least it did
it right where the hinge started). Once I had my pieces
all cut, including a small triangle shaped piece for the top I
reattached them using "Marine Goop"
basically because it sounded cool.... |
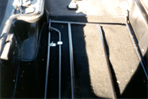
 With
the rack piece done, you can focus your attention to the trunk,
where you will probably be storing the rack when not in
use. With the rack comes a bracket to secure the
rack. Take out your trunk carpet and find the are in the
picture to the left. With
the rack piece done, you can focus your attention to the trunk,
where you will probably be storing the rack when not in
use. With the rack comes a bracket to secure the
rack. Take out your trunk carpet and find the are in the
picture to the left.
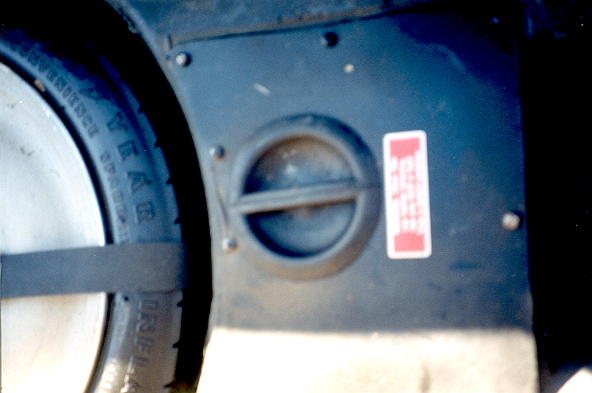
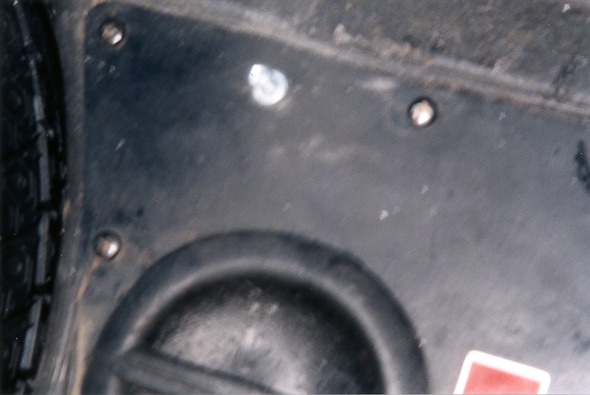
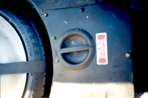
 We
are going to drill a 1/4 inch hole through the fiber glass
between the top two screws. BE CAREFUL. there is a
tank just under this panel that you probably do not want to
drill into. The picture to the right shows the hole that I
drilled. You then have to take the provided screw and feed
it through the hole from the bottom. With my long skinny
fingers, I figured I could do this without removing the panel (WRONG). We
are going to drill a 1/4 inch hole through the fiber glass
between the top two screws. BE CAREFUL. there is a
tank just under this panel that you probably do not want to
drill into. The picture to the right shows the hole that I
drilled. You then have to take the provided screw and feed
it through the hole from the bottom. With my long skinny
fingers, I figured I could do this without removing the panel (WRONG). |
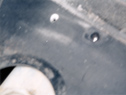
 I
ended up taking most of the screws out and lifting the panel up
(breaking the nice factory seal...oh well). Screw in the
bolt and you have a nice....well, screw and bolt sticking up
from the floor of the trunk see picture to the left). Replace
your carpet and mark where the bolt hits the underside (I
wiggled the carpet around a little to make a mark). I
ended up taking most of the screws out and lifting the panel up
(breaking the nice factory seal...oh well). Screw in the
bolt and you have a nice....well, screw and bolt sticking up
from the floor of the trunk see picture to the left). Replace
your carpet and mark where the bolt hits the underside (I
wiggled the carpet around a little to make a mark).
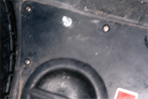
 The
directions say to "cut a hole in your carpet," screw
that...drilling is much more fun. Take the same 1/4 inch
drill bit and make a nice hole from the underside. Replace your
carpet and feed the screw through the hole. You can then
add the metal restraining piece and secure it with the wing nut
(right). This is, again, used to lock down the rack when
not in use to ensure that it doesn't rattle all over the
place. The
directions say to "cut a hole in your carpet," screw
that...drilling is much more fun. Take the same 1/4 inch
drill bit and make a nice hole from the underside. Replace your
carpet and feed the screw through the hole. You can then
add the metal restraining piece and secure it with the wing nut
(right). This is, again, used to lock down the rack when
not in use to ensure that it doesn't rattle all over the
place. |
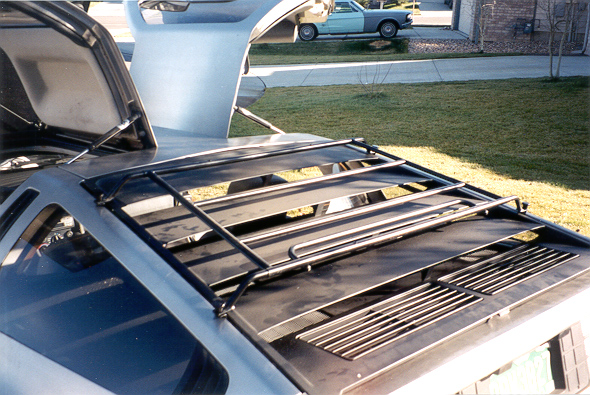
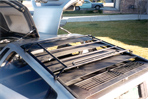
 The picture to
the left shows the rack all stowed away and ready for
traveling. The picture to
the left shows the rack all stowed away and ready for
traveling.
 When
removed the extra pieces fit nicely into the supplied storage
bag and I was able to make this fit in with the tool case in the
front storage compartment of the trunk. To the right is
one of my helpers (and part of the reason the install took me so
long...along with a trip to get more drill bits). I was at
a co-workers house and his sons (ages 3 and 5) had never seen a
DeLorean before. My doors sure got their stress testing
that day...The drivers side door was opened and closed about 500
times....but I can understand the appeal! When
removed the extra pieces fit nicely into the supplied storage
bag and I was able to make this fit in with the tool case in the
front storage compartment of the trunk. To the right is
one of my helpers (and part of the reason the install took me so
long...along with a trip to get more drill bits). I was at
a co-workers house and his sons (ages 3 and 5) had never seen a
DeLorean before. My doors sure got their stress testing
that day...The drivers side door was opened and closed about 500
times....but I can understand the appeal! |
| NEW Click
here to see the directions that
came with the luggage rack (in all their glory) |
This page last modified on
Tuesday, April 08, 2008
|